Cross Platform Development In CPP with Djinni
Assuming you need to make apps for Android & iOS platforms. Now, you develop these apps from different code bases to realise you’re repeating yourself since most of the business logic you write remains same across platforms (except if you think people with iOS devices are rich and can be charged more than Android users). Then you explore platforms like Flutter & react native. These are good, but nothing can match the versatility native app development gives you.
So you look beyond this to think: what if I write the common business logic at one place and just call it from across platforms? Then you encounter CPP in this context: meaning core logic written in CPP, and your clients (Android and iOS) just calling methods, and passing data from UI to CPP. This way you get best of both worlds.
To facilitate this, folks at Dropbox made Djinni so that you can define the interfaces and call CPP methods right from Java (in case of Android) and Objective C (in case of iOS). Djinni can be used to interface cross-platform C++ library code with platform-specific Java and Objective-C on Android and iOS.
This particular article discusses Android client only. The iOS client however can follow similiar steps for installing & configuring Djinni.
Let’s get started:
- Prerequisites: make, Android Studio with NDK installed.
- Make a project directory hello_world and inside this directory clone the djinni repo from GitHub
-
[Only for the first time]
~/hello_world $ cd djinni/
~/hello_world/djinni $ make
This process will take time as it includes compiling the library from source.
-
Create a folder named idl which will hold all the idl (Interface Description Langauage) files for our project & make a file called as greeting.djinni
~/hello_world $ mkdir idl ~/hello_world $ cd idl/ ~/hello_world/idl $ nano greeting.djinni -
This file is used to write interfaces for which Djinni will generate the code for you.
# greeting.djinni greeting_service = interface +c { static create_service() : greeting_service; greet(who: string) : string; } -
Now, to generate code for this djinni file, we need to use the run command at greeting/djinni/src/run passing greeting.djinni as input to the script. But we also need to pass some additional parameters, like package name for generated java packages, etc. so we create a bash file named run_djinni.sh to make life easy.
# run_djinni.sh
#!/bin/bash
rm -r generated/*
djinni/src/run \
 --java-out generated/me/ajinkyabawaskar/helloworld \
 --java-package me.ajinkyabawaskar.helloworld \
 \
 --cpp-out generated/cpp/ \
 --cpp-optional-template std::experimental::optional \
 --cpp-optional-header "<experimental/optional> \
 \
 --objc-out generated/objc/ \
 --objcpp-out generated/objcpp/ \
 --objc-type-prefix SJ \
 \
 --idl idl/greeting.djinni
Now, to generate the code, we need to do:
~/hello_world $ ./run_djinni.sh
Already up to date: Djinni
Parsing...
Resolving...
Generating...
Until this step your project directory should look like:
~/hello_world $ ls djinni generated idl run_djinni.sh -
Djinni has generated code for us among which is a CPP header that resides in generated/cpp/greeting_service.hpp & we need to implement it in CPP. For this code we create a directory to store our CPP implementations.
~/hello_world $ mkdir cpp ~/hello_world $ ls cpp djinni generated idl run_djinni.sh -
Now, we move on to Android part of the implementation, so we create a new Android Project in Android Studio of type ‘Native C++’, & C++ 11 as our CPP standard with Name DjinniClient:
~/DjinniClient $ ls app gradle build.gradle gradle.properties .... -
Create a directory djinni & create symlinks of our generated CPP code inside this directory.
~/DjinniClient $ mkdir app/src/djinni ~/DjinniClient $ cd app/src/djinni ~/DjinniClient/app/src/djinni $ ln -s ~/hello_world/idl ~/DjinniClient/app/src/djinni $ ln -s ~/hello_world/generated ~/DjinniClient/app/src/djinni $ ln -s ~/hello_world/djinni/support-lib ~/DjinniClient/app/src/djinni $ cd ../../../ -
We remove the cpp directory created for us by Android Studio and place our cpp directory’s symlink in place of the folder.
~/DjinniClient $ rm -r app/src/main/cpp ~/DjinniClient $ cd app/src/main ~/DjinniClient $ ln -s ~/hello_world/cpp ~/DjinniClient/app/src/main $ ls AndroidManifest.xml cpp java res -
Time to implement our greet method in CPP. To do that, we need to create 2 files - the CPP header and it’s implementation.
~/DjinniClient/app/src/main/cpp $ touch greeting_service_impl.cpp
~/DjinniClient/app/src/main/cpp $ touch greeting_service_impl.h
// greeting_service_impl.h #pragma once #include <memory> #include <string> #include "greeting_service.hpp" class GreetingServiceImpl : public GreetingService { public: virtual std::string greet(const std::string &who) override; }// greeting_service_impl.cpp #include "greeting_service_impl.h" std::shared_ptr<GreetingService> GreetingService::create_service() { return std::make_shared<GreetingServiceImpl>(); } std::string GreetingServiceImpl::greet(const std::string &who) { return "Hello, " + who + "!"; } -
Making CMakeLists.txt to configure compiling and linking process of CPP:
~/DjinniClient/app/ $ touch CMakeLists.txt# Sets the minimum version of CMake required to build the native # library. You should either keep the default value or only pass a # value of 3.4.0 or lower. cmake_minimum_required(VERSION 3.4.1) # Path to the djinni support code set(support_dir src/djinni/support-lib/jni) # Path to the generated code and our own c++ implementations set(include_dirs src/djinni/generated/cpp/ src/djinni/generated/jni/ src/main/cpp/) # Djinni support code that needs to be compiled file( GLOB_RECURSE support_srcs ${support_dir}/*.cpp) # Generated code and c++ implementations that need to be compiled file( GLOB_RECURSE lib_srcs src/djinni/generated/cpp/*.cpp src/djinni/generated/jni/*.cpp src/main/cpp/*.cpp) # All the implementation files that make up our library set(complete_srcs ${support_srcs} ${lib_srcs}) # Define library referring to the sources above add_library(native-lib SHARED ${complete_srcs}) # Define INCLUDE_DIRECTORIES property for native-lib target_include_directories( native-lib PUBLIC ${include_dirs} ${support_dir}) -
Modify the build.gradle file to reflect appropriate CPP flags along with path of CMakeLists.txt we created in previous step.
# only the changes in build.gradle defaultConfig { externalNativeBuild { cmake { cppFlags '-std=c++11 -frtti -fexceptions' } } } externalNativeBuild { cmake { path file('CMakeLists.txt') } } # add the sourceSets sourceSets { main.java.srcDirs += 'src/djinni/generated/java' } -
Now that we have everything set up, do a Gradle Sync once to check if any errors come in. Otherwise we start writing our code in MainActivity.java
import ...; public class MainActivity extends AppCompatActivity { GreetingService greetingService; // Used to load the 'native-lib' library on application startup. static { System.loadLibrary("native-lib"); } private ActivityMainBinding binding; @Override protected void onCreate(Bundle savedInstanceState) { super.onCreate(savedInstanceState); binding = ActivityMainBinding.inflate(getLayoutInflater()); setContentView(binding.getRoot()); TextView tv = binding.sampleText; greetingService = GreetingService.createService(); String greeting = greetingService.greet("World"); tv.setText(greeting); } } -
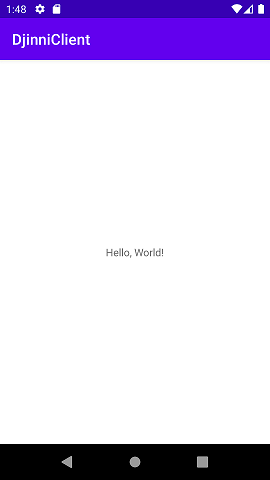
Finally, here is the sweet sweet result of all the effort till now: “Hello, World!”
References:
- Stephan Jaetzold - Djinni Demo GitHub
- Djinni in a bottle - Video Tutorial